In this article, you'll learn how to customise your Xero Automation rules so that your invitations are sent the way you'd like them
When you connect Xero with betterbunch to automate the creation of your invitations, you'll find a variety of customisable settings to tailor how your Xero-generated invites are filtered and sent. These settings include:
- Trigger settings determine which Xero invoices will generate an invitation.
- Keyword settings allow you to control whether invitations are sent based on specific keywords found in the Xero invoice.
- Cool off period blocks invitation from being sent if the contact has received one recently.
- Sending delay allows you to postpone the delivery of invitations, ensuring they are sent after a specific number of days.
- Sending times schedules your invitation to send at the best send time.
Tip: Once you have made changes your Xero Automation rules, we recommend checking your Invitation logs after a few days. This will help you confirm that your invitations are being sent as intended.
Trigger settings
When your Xero account is connected to betterbunch, you can set up a trigger to automatically generate a betterbunch invitation whenever a Xero invoice is marked as either approved or complete (also referred to as reconciled).
Tip: We recommend setting the invitations to be sent when the invoice is approved, as this allows you to request feedback promptly after the job is completed. Sending invitations quickly after a job is complete increases response rates because your service is still fresh in the client's mind.
Keep in mind that once the invitation trigger is activated, the invite will be subject to additional checks based on your other settings and may be blocked.
Xero credit notes will affect your Xero automation trigger settings. If your settings specifies that invitations should be sent when an invoice is marked as complete, a full credit note will prevent the invitation from being sent. However, if both a partial payment and a partial credit note are applied to the invoice, the invitation will still be triggered.
To adjust your trigger settings, follow these steps:
-
Login to your betterbunch account.
-
Navigate to the Automation page on the left menu.
- Click Edit the Xero settings.
- Select whether you want your betterbunch invitations to be sent when the invoice is marked as Invoice approved or Payment complete within Xero.
- Click Save.
Keyword settings
Keyword settings will scan your Xero invoice looking for keywords in the reference, description and account fields. 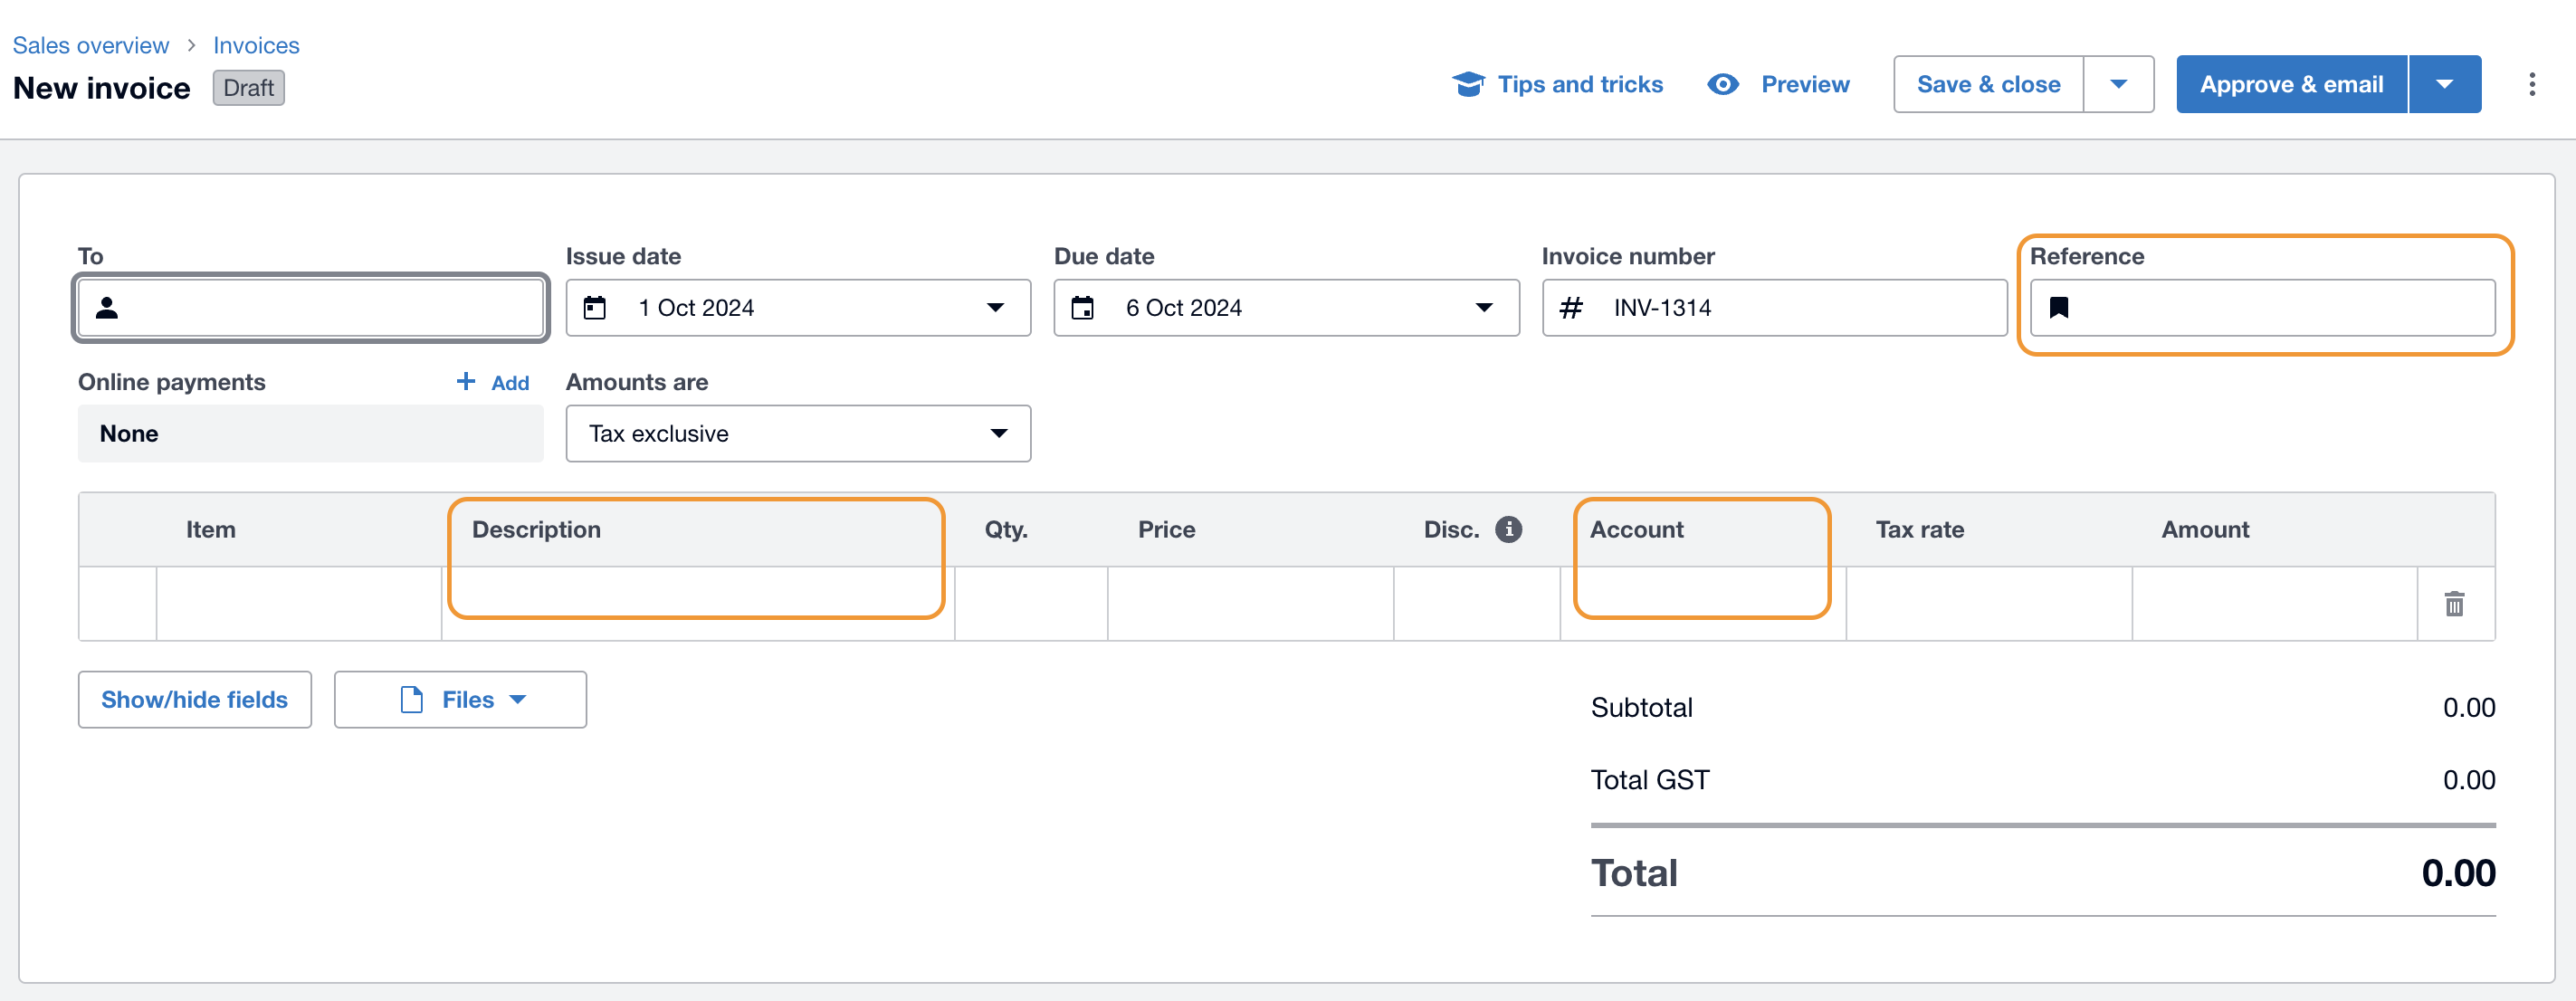
Xero Keyword filters allow you to:
- 'Dont send invites' which will block any invitation from sending if the invoice contains one of your keywords
- 'Send invites' which will only send an invitation is the invoice contains one of your keywords
- 'Ignore' which will ignore the Xero keyword filter settings
Tip: Use Xero keyword filters to block invitations from being generated by a part-payment or deposit invoice. For example, set your keyword settings to 'don't send invites' if the Xero invoice contains the keyword 'deposit'.
After successfully connecting Xero with betterbunch as outlined in this guide, you can easily add and modify your Xero keyword settings by following the steps below:
-
Login to your betterbunch account.
-
Navigate to the Settings page on the bottom left of your dashboard.
-
Open the Rules tab.
- From the drop-down, select 'ignore' 'send invites' or 'don't send invites'
-
Add your keywords to the box below
- Click Save. It's that easy!
Cool off period
The Cool Off Period feature prevents you from sending repeat invitations to a contact during a specified timeframe.
If an invitation is created through Automation and the contact is found to be within the Cool Off Period, betterbunch will automatically delete the invitation.
Tip: If you repeat work with specific clients, consider setting your cool off period to 180 days. This approach allows you to send only one feedback invitation every six months, ensuring you stay connected without overwhelming your customers with requests.
Learn how to set your cool off period here.
Sending delay
Adding a sending delay into your Xero Automation settings will defer your invitations to send at a later date. This means when the trigger settings are met, your invitations will be sent 1, 2 or even 10 days later.
Tip: When you first connect Xero with betterbunch, consider setting a sending delay of 5 days. This allows you to monitor the invitations that are automatically generated before they are sent to your customers.
Once you are satisfied with how everything is functioning, adjust the sending delay to 1 day so invitations are sent promptly after the job is finished.
Follow the steps below to see how to set your sending delay.
-
Login to your betterbunch account.
-
Head to the Settings page on the bottom left of your dashboard.
-
Navigate to the Rules tab.
- Type the number of days you'd like to defer your message into the Sending Delay textbox.
- Click Save.
Sending times
When automation is connected, betterbunch will send your invitations at the best time to send within 24 hours.
Note: You can customize the timing of your Xero invitations by adjusting your quiet time settings. For more information on how to set your quiet times, click here.